Summary
Polarizer skateboarding is a unique form of skateboarding where the idea is to build a modern version of a 1960s setup. My intention with this setup was to experiment with the most current and advanced parts available to see how much of a difference it makes. High rebound bushings and wheels, as well as a Powell Peralta flight deck, result in this beautiful abomination that rides like no other.
Setup Price: $180 (ish)
Components
It’s been almost a year since the last polarizer article, and it’s time to make another.

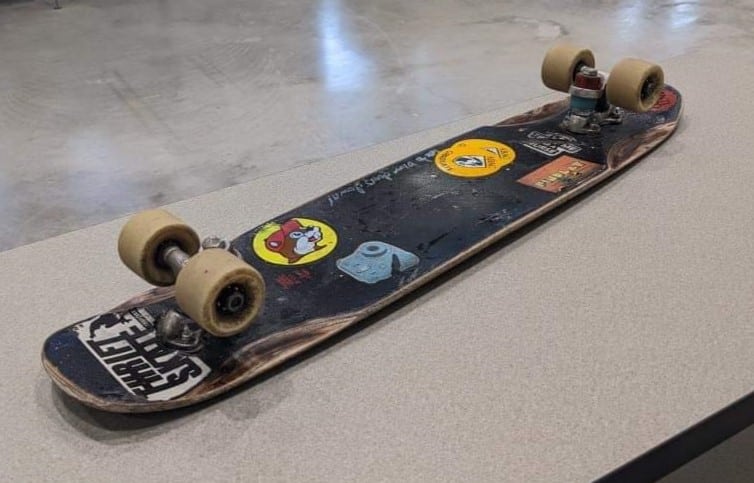
Deck
The deck is the main aspect of this setup that makes it unique. Made out of a secret blend of Canadian maple, fiberglass, and carbon fiber, a well-used Andy Anderson Flight deck became the canvas on which I would create what would become one of the best riding polarizers I have ever stepped foot on.
Characteristics
Powell Peralta Flight decks are technological masterpieces showing the evolution of skateboarding beyond the means of traditional skateboard construction, but what happens when you turn one upside down?
Well, the answer is simple. They are just as rad.
The interesting thing about these boards is the unique flex properties that allow them to keep their pop after extended use. So when approaching the end of the deck’s life it still held onto those properties for some time; however, it would actually become a better polarizer over time. The paper-thin, ultralight deck went from rather stiff to moderately flexy after a few months of riding, and the flex that can be attained from this board is astounding.
As mentioned in the previous article, with a polarizer you want the deck to flex. The flex wedges the trucks, and this makes it so that the harder you turn, the tighter the turning radius, but that does not mean you want a flexy deck. If it’s super flexy, then you won’t get the right feel from the board. That is why the overall theme of this setup is high rebound.
High rebound is a big term nowadays used most commonly for wheels and bushings, but what does this mean and why am I talking about it? Well, because high rebound is awesome. When standing on the deck and just riding straight, it’s stiff. Just like any other skateboard, but when doing a heavy carve standing between the trucks, the deck flexes. Like some skateboards. What makes this board different is how deep it can flex in a carve and how quickly it snaps back into its original position. It feels like its spring
The closest thing I can compare it to is bike forks. If you ride bikes with suspension you will know what I’m talking about. Most Diy polarizers are similar to a mountain bike fork that has 100mm of travel with the rebound on high, and low if it’s waterlogged. The regular name-brand Heated wheel polarizers that I have ridden are more like a fork with 100mm of travel with a medium rebound. The Flight deck is like a 140mm bike fork with the rebound on high. I hope that helps.
Shape
I really liked the Andy Anderson shape. The wheelbase was a tad bit too long for my personal preference, but otherwise, the shape was new and refreshing. I skated this board almost every day for about 12 months, and I really liked how the board started as a sharp angular deck that wore down into a more rounded shape. I took inspiration from this when shaping the deck.
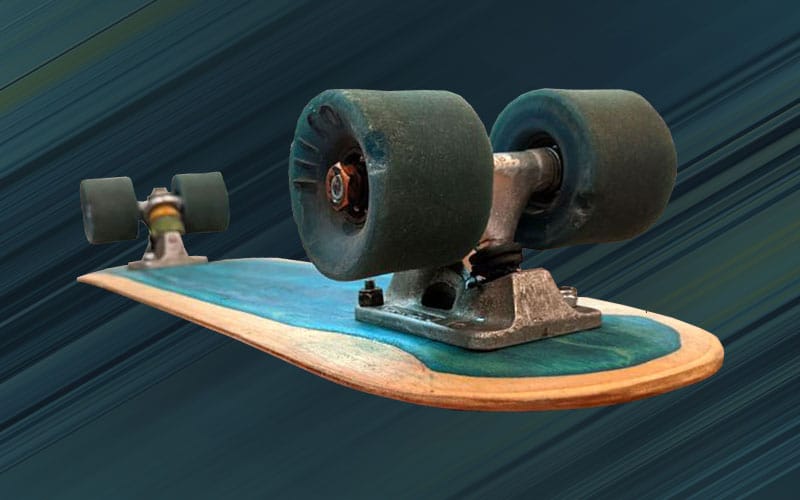
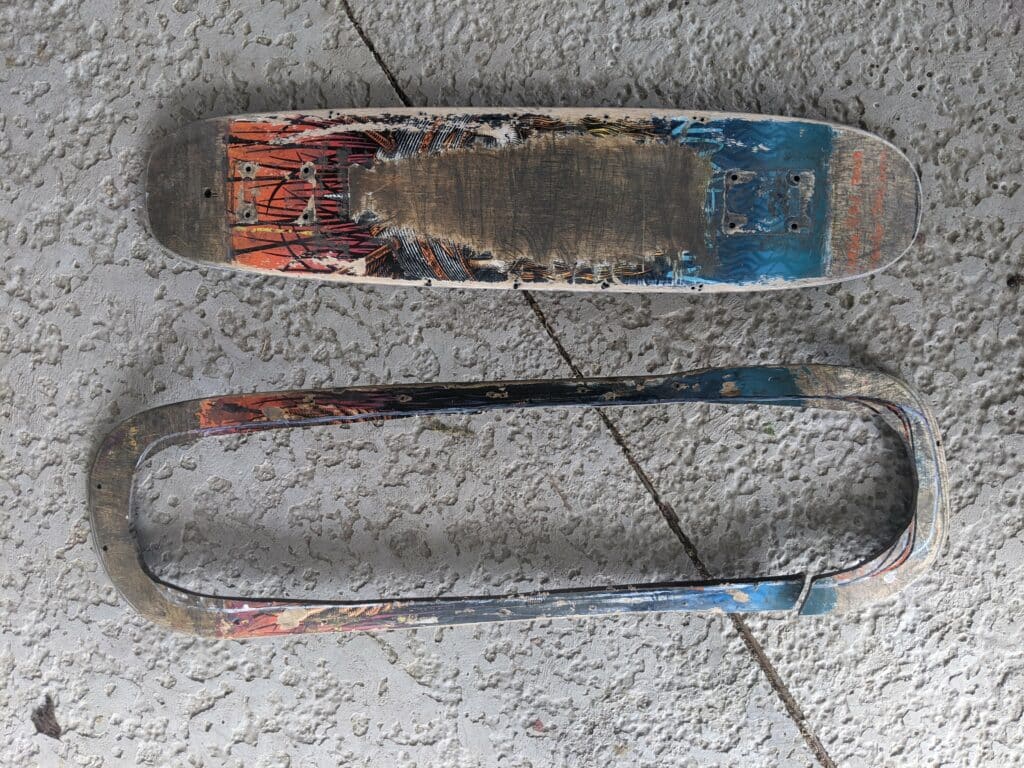
The original intent was to have a board that was omnidirectional. Both sides were tails in their own ways.
The right side of the photo above shows the tail intended for general riding, so for simplicity, the is on the right. It’s slightly longer measuring 4 inches in length, and the shape is more rounded to accommodate flat ground 360s.
The widest part of the board measured 6.5in, and it’s not in the middle. It’s actually between the midpoint of the deck and the tail. In the photo above the widest point is on the right side.
The reason why I did this was so that when the board is ridden in the other direction, it would favor a pool or bowl skating setup. So when riding the board using the nose on the left side of the photo as the tail, you get a totally different riding experience. The widest point of the board is now more towards the nose giving more stability, and the shorter tail measuring 3in made it easier for me to drop in. I found that with inverted kick tails, a shorter tail felt more comfortable to drop in with.
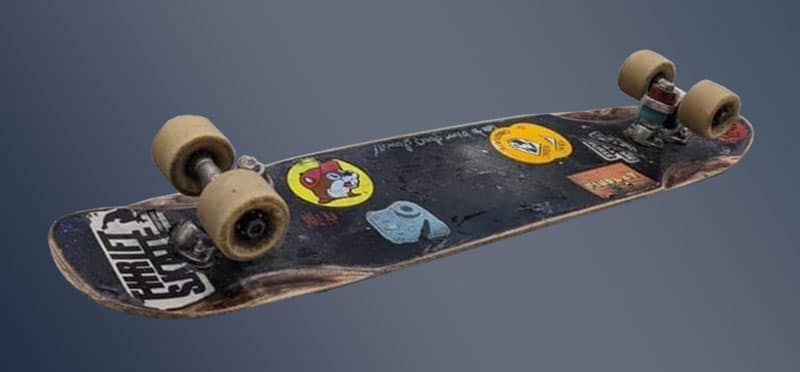
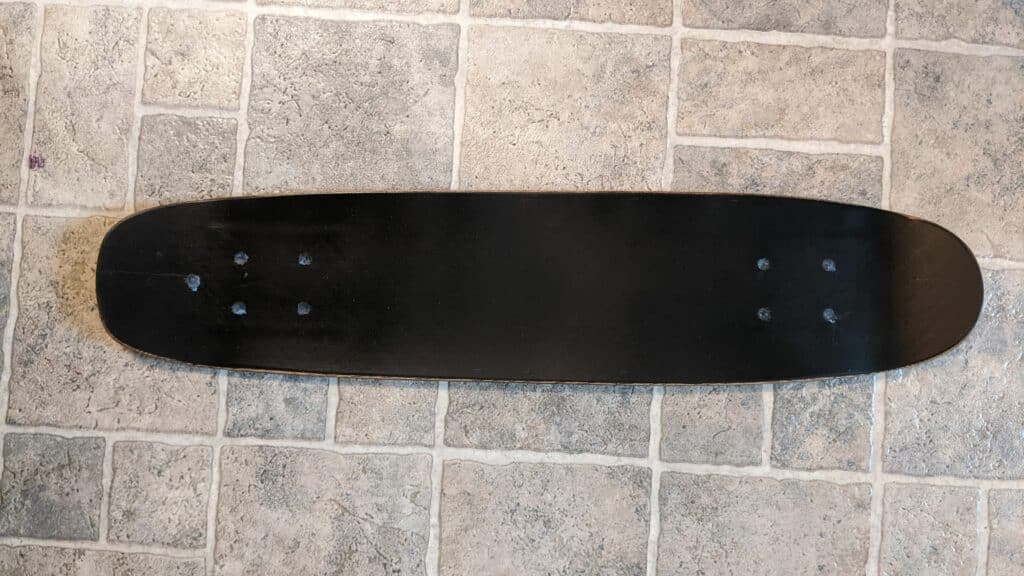
This shape was totally experimental, and after riding this deck for 6 months, the gradual modifications led to totally different shape.
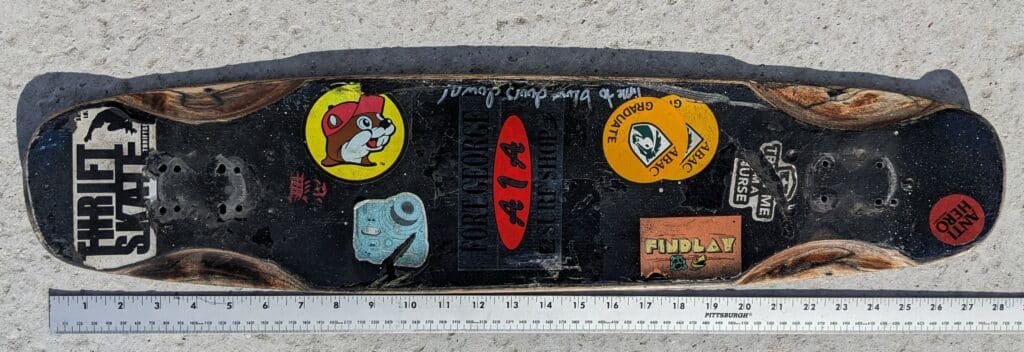
Besides the addition of wheel wells, scratches, and a variety of stickers I had randomly obtained, the shape favored the 3-inch tail with a uniform symmetrical shape. I think that the idea of an omnidirectional deck is awesome, but not ideal in this situation. The deck now more closely resembles a traditional street deck than a polarizer; however, the modifications showed significant improvement in performance. The uniform deck shape favored the flex patterns as well as the setup.
The symmetrical deck shape with the widest point in the middle made carving more consistent, and I think that this is due to a more uniform amount of torque being applied to the trucks.
In conclusion, I found that technical riding favors a simple deck shape, but that is just a personal preference, and I encourage creativity, especially when building a polarizer.
Trucks
What trucks would pair best with arguably the most scientifically advanced polarizer deck ever made? This is where the technological advancements end because I used a set of sure grip trucks. Tried and true, the sure grips will do.
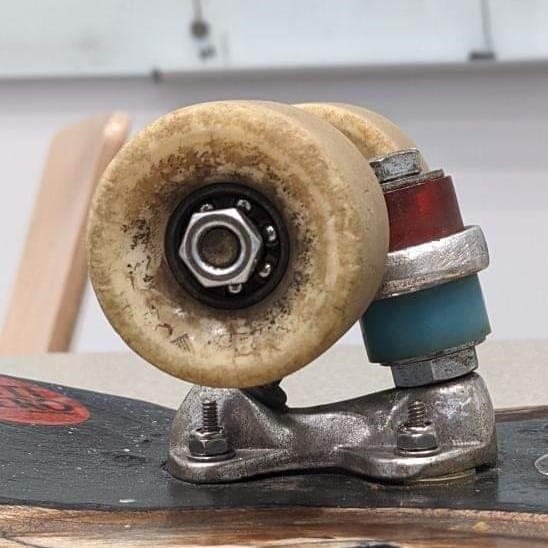
Bushings
Now here is where things get interesting. As much as I like the standard 78a Powerdyne bushing combo, there was something missing, and that something came in the form of 83a APS Riptide Magnum bushings. These are extra tall, and extra wide bushings that when put on the board side allow the truck to pivot further than most other bushings I have tried. These bushings are higher rebound in a soft formula meaning that resistance increases as force is applied. So I could turn sharper with more stability.
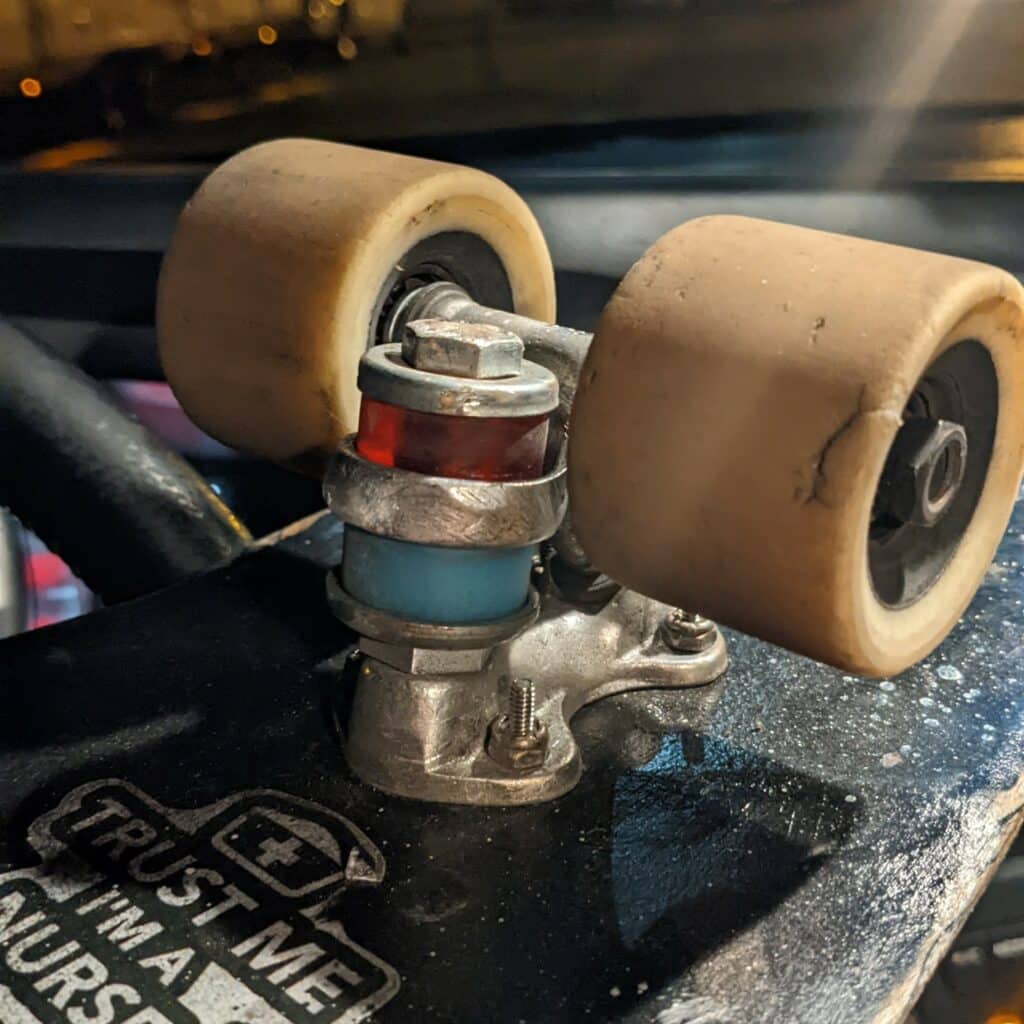
The Riptide 83a magnums paired with a traditional Powerdyne 78a bushing on the roadside allowed the perfect combination between a loose truck that felt stable. At least for me. Keep in mind that I’m about 6’1 and 160-180lbs (I’m in college lol).
This bushing configuration made going faster easier. I think my top speed was 27mph on this board, and it felt stable. This concept honestly does not make sense when writing this, and I think that it may be something that one would have to try in order to fully understand. It’s a loose carvy setup when growing slow, but when you pick up speed it feels stable. It’s weird lol
Another interesting aspect that this bushing combo created was the ability to have more predictable slides. I know it’s odd to mention slides in a polarizer article, but I made a polarizer out of a flight deck, so what do you expect? With soft bushings like a stock set of Powerdynes, slides were tricky. In order to get the wheels to break traction, I would have to use a lot of force in order to get the wheels to break traction. If I just tried to slide like normal, I would just do a really sharp turn. Which is cool, but the problem comes with trying to maintain a slide with softer, lower rebound bushings. They don’t keep the wheels on the ground, and it makes the slides feel inconsistent. With the higher rebound riptide bushing on the broadside, it kept the wheels on the ground, and made slides a whole lot more fun!
Wheels
So we have a high rebound deck, and high rebound bushings, so naturally I went with a high rebound wheel.
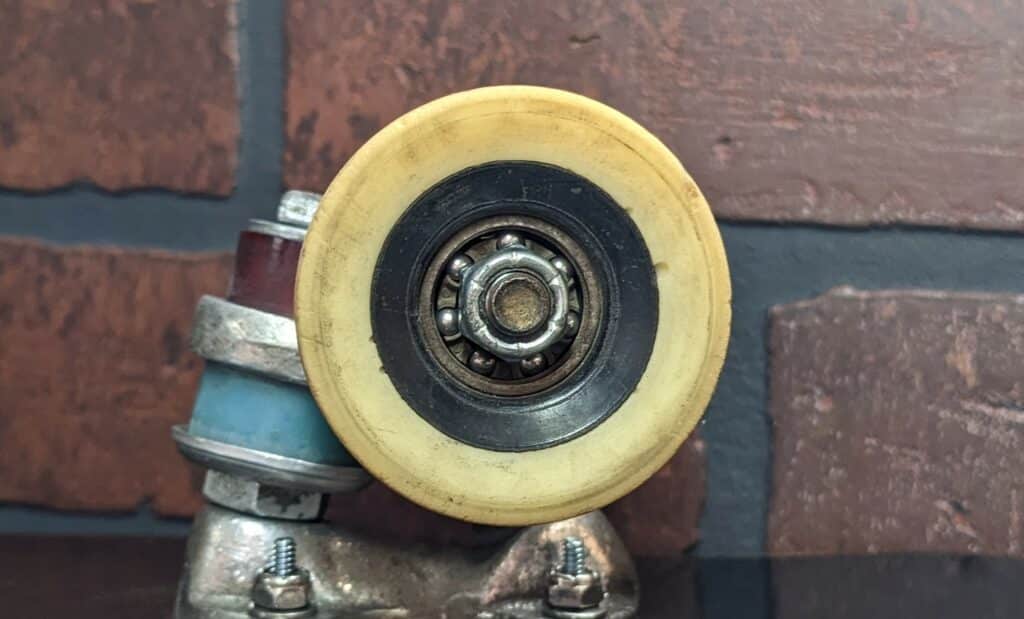
The Powell Peralta G-Slides is a 56mm 85a wheel with a high rebound formula, center set bearing seats, and a 31.5mm contact patch putting these wheels on the slightly beefier side of what most people use on their polarizers.
This is a certified slide wheel that is soft for carving and cruising, but slick when you get them sideways. I’m not sure what kind of alchemy they are doing at the Powell Peralta factory, but I’m all about it! These wheels are awesome! The only major downside is that if you pump hard, they have a tendency to slide out, but the slide is consistent and predictable, so it doesn’t usually mess up your flow.
Now there is another wheel from Powell that I originally tried just for the fun of it, but they quickly proved to be phenomenal polarizer wheels, and this is the 56mm 93a Dragon Formula Wheel.
This wheel was intended to be a hybrid formula that would give street skaters a soft wheel that could perform as well if not better than a traditional street wheel on rougher terrain. One of the key aspects that makes this wheel unique is how it slides. The way this wheel works is an article of its own, but for the purposes of this article, these are amazing!
These wheels turned my polarizer into a mini tech slide machine, but at the same time, they were fully capable wheels for the polarizer. I could carve while maintaining grip but only to a degree. The g slides only slid when force pushed them sideways, so after some practice, I could carve as tight as I wanted at nearly any speed. The dragons function the same, but the amount of force it took for them to break traction was significantly less. I like to slide, so these wheels fit my style, but I would be careful when considering these wheels.
How it all works together
High rebound wheels, bushings, and deck. Sadly, If you jump down a stair set with this setup, you do not bounce like a trampoline when you hit the ground. I tried several times, but no. You just roll away.
So when everything is high rebound, does it really make a difference?
Yes, and no. Quite simply, this is a setup tuned more for going fast while maintaining the ability to turn sharply. One could easily accomplish the same goal by just tightening, and loosening the trucks. The flex of the board is awesome, but not really necessary, and the only real benefit of the wheels is the added ability to slide a polarizer. So compared to a traditional polarizer, there is not much of a difference, and there is nothing I could write to convince you otherwise except…
How far can we take it? What is the absolute limit of how far we can advance our nearly forgotten ancestors of skateboarding? This is what makes polarizers so cool. They are raw and undiscovered. You can literally make whatever you want from it. As we ride these boards and experiment with them we discover new things or techniques that allow us to get more from them, and then they become something totally different than what was originally created. In my case, I currently possess possibly the most advanced polarizer setup ever, and I’m telling you that if you get ahold of a flight deck, you should skate it for as long as possible, cut out a shape, flip it upside down, and ride it for no other reason than its cool as crap! It’s great! Why not? I paid $85 for that thing, and you can bet I’m getting my money’s worth. Jokes aside, I think my experiment was successful, and If you think this is the most advanced polarizer setup, please let us know. I would love to see if my results can be replicated.
So if you do make a flight deck polarizer. Please DM me your results.